Freecom provide POP/IMAP which can be accessed from our Freecom Webmail and Microsoft Office 365 email accounts from the Microsoft Office 365 Portal.
Both Freecom POP/IMAP and Office 365 emails can be set up in a local email client, below are guides for the latest versions of most popular email clients that you can install on your device to manage your emails.
PLEASE NOTE: Microsoft Office 2003 and Microsoft Office 2007 are no longer supported by Microsoft, which means they will not receive and security updates, bug fixes or new features due to their age. Because of this, we do not provide any setup guides for them, or recommend you continue to use them.
Our email service, however, should work without issue using the following software.
Microsoft Outlook 2016
Step1:
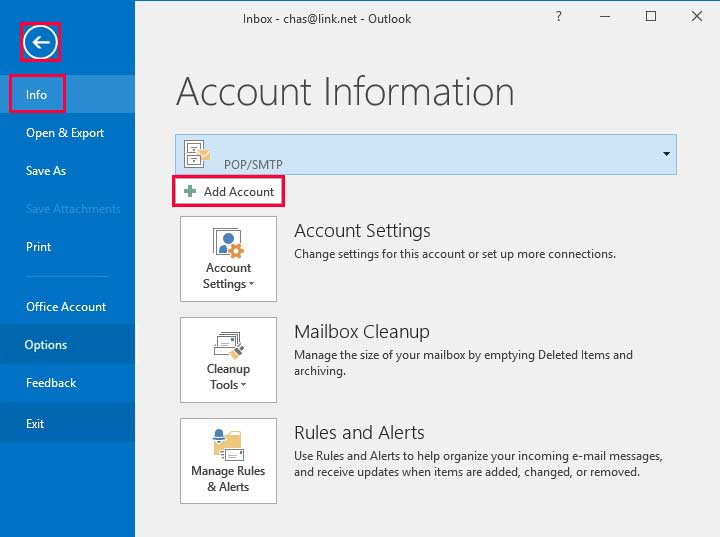
Open Outlook 2016, select File > Info > Add Account from the menu
Step 2:
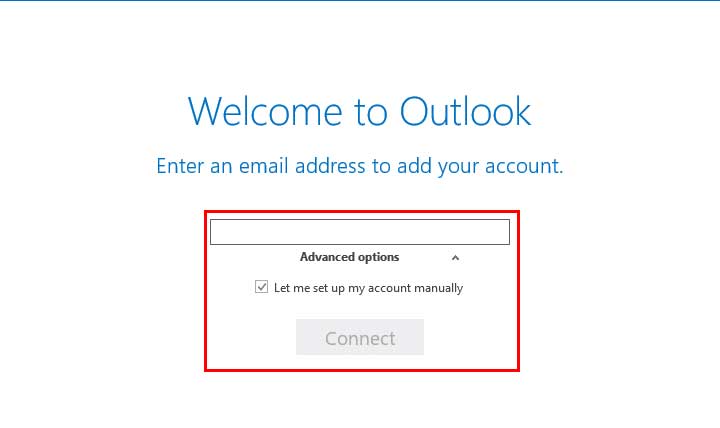
After entering your email address, select Advanced Options and tick the option to set up manually. Then press Connect to continue
Step 3:
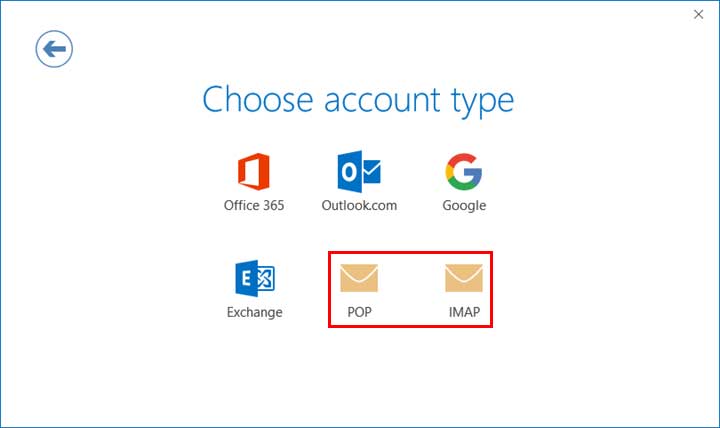
Select either POP or IMAP account to configure the account
Step 4:
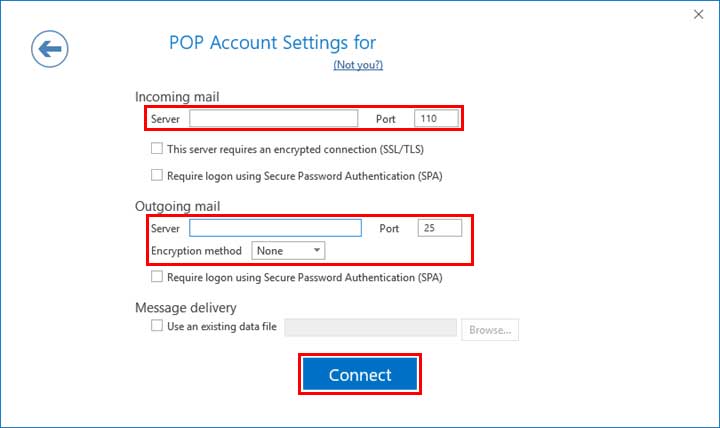
Fill out the details on the next screen.
Select the type of account: POP3 or IMAP
Incoming Server – POP: pop.freecom.net
Incoming Server – IMAP: imap.freecom.net
The logon username will always be your email address
Microsoft Outlook 2013
Step1:
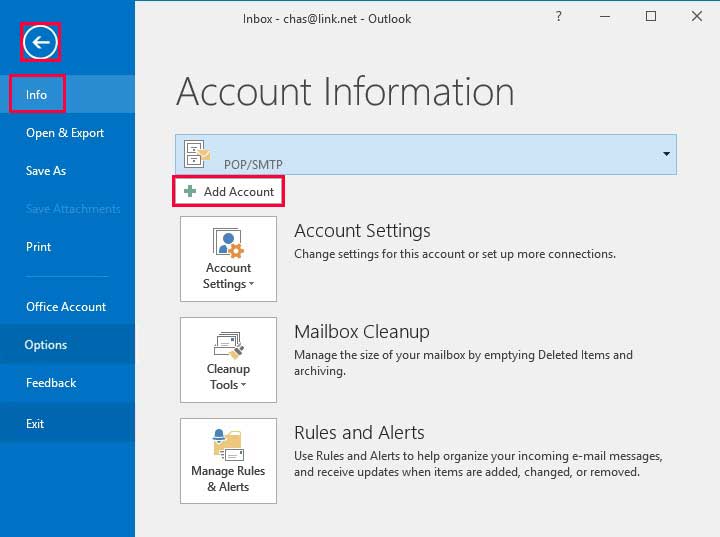
Open Outlook 2016, select File > Info > Add Account from the menu
Step 2:
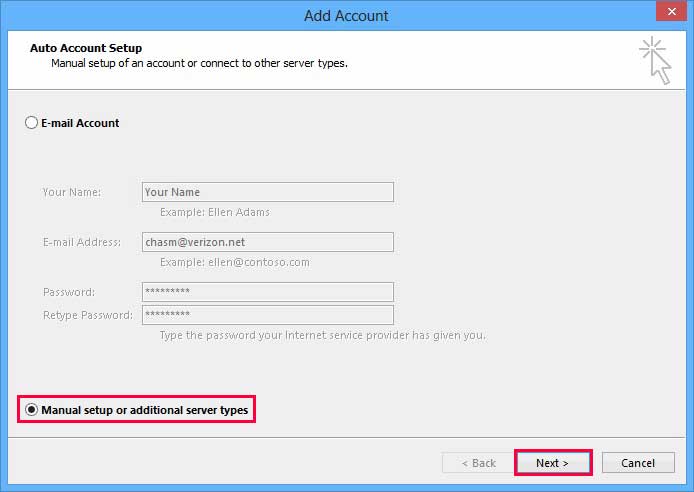
Select Manually Configure Server Settings and press Next
Step 3:
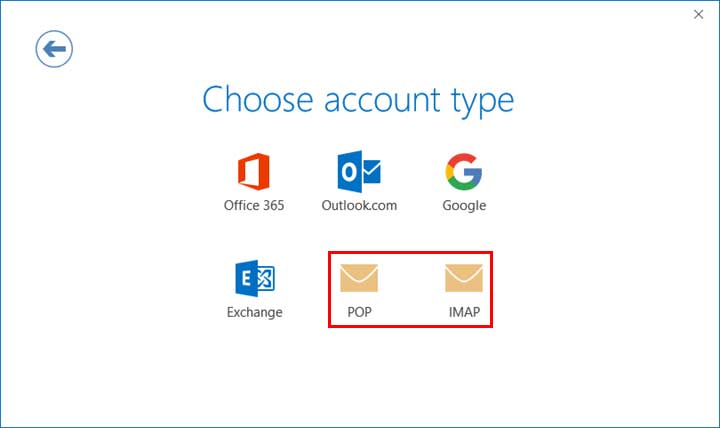
Select either POP or IMAP account to configure the account
Step 4:
Fill out the details on the next screen.
Select the type of account: POP3 or IMAP
Incoming Server – POP: pop.freecom.net
Incoming Server – IMAP: imap.freecom.net
The logon username will always be your email address

Microsoft Outlook 2010
Step1:
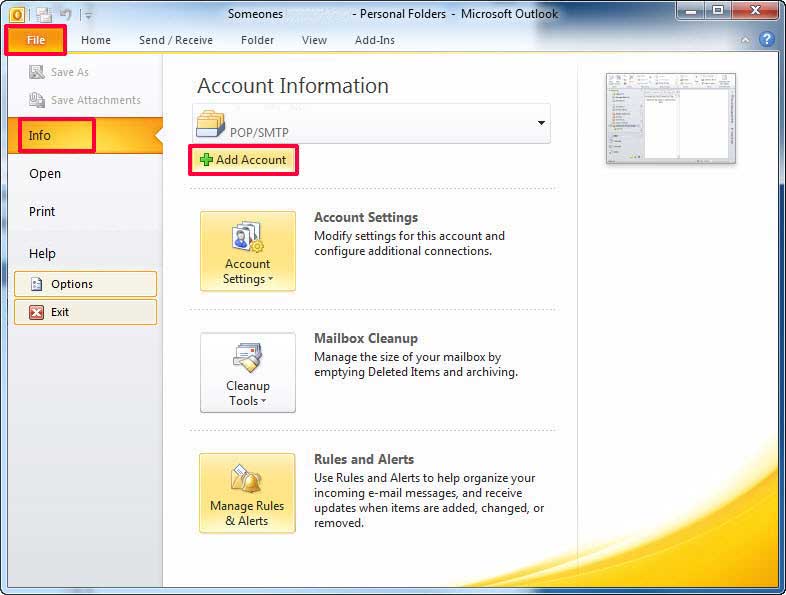
Open Outlook 2013, select File > Info > Add Account from the menu
Step 2:
Select Manually Configure Server Settings and press Next
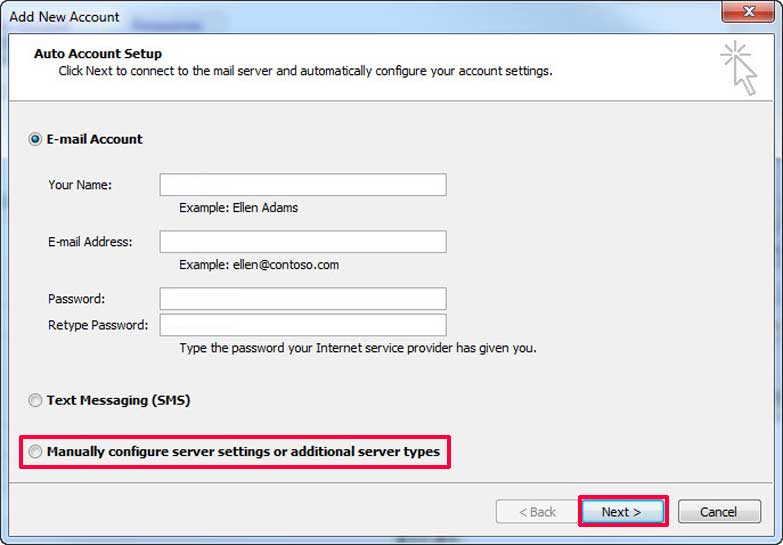
Step 3:
Fill out the details on the next screen.
Select the type of account: POP3 or IMAP
Incoming Server – POP: pop.freecom.net
Incoming Server – IMAP: imap.freecom.net
The logon username will always be your email address
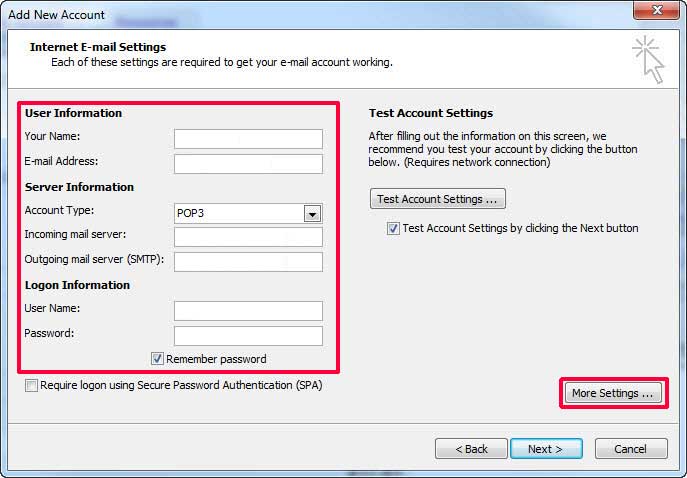
Step 4:
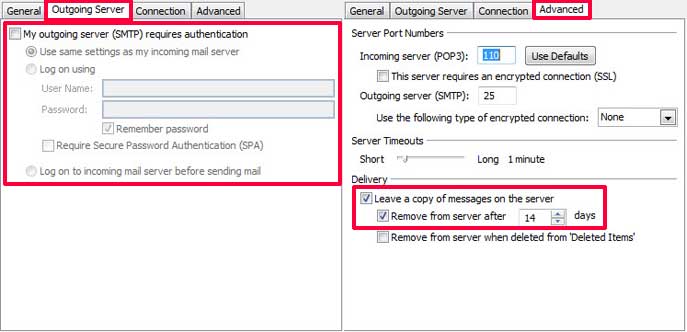
Once you have added your details. If you are using our Authenticated SMTP Server, then select More Settings and select the Outgoing Server tab.
Fill out the username and password that is unique to your account. Remember Secure Password Authentication (SPA) is NOT ticked.
If you want to store your emails on the server as well as your local machine, select the Advanced tab and enabled Leave a Copy. Remember to set a date for older emails to be removed, otherwise your online inbox will fill up quickly
Windows Mail
Step 1:
Open Windows Mail and select Accounts and then Add Account
Step 2:
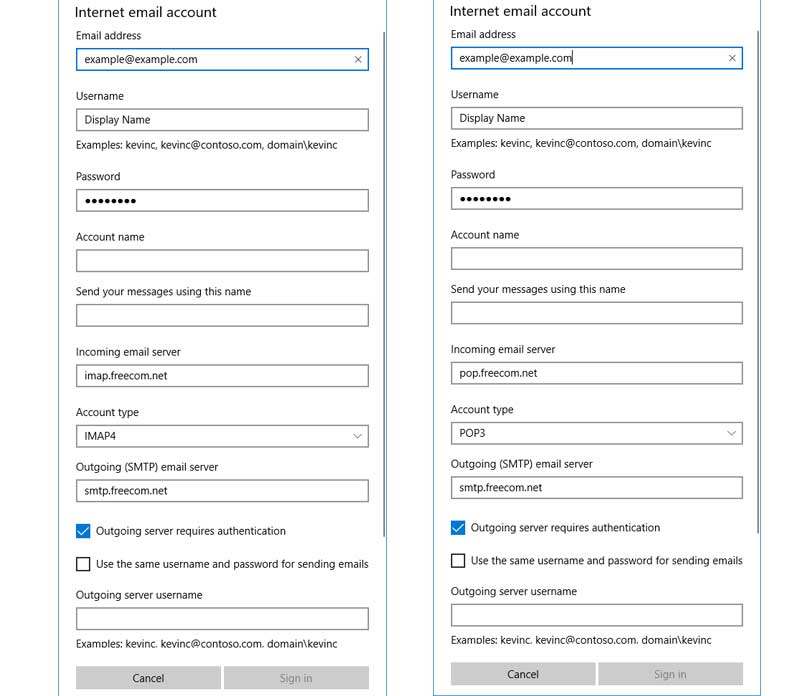
Select Advance Setup and select Internet Email for POP or IMAP accounts.
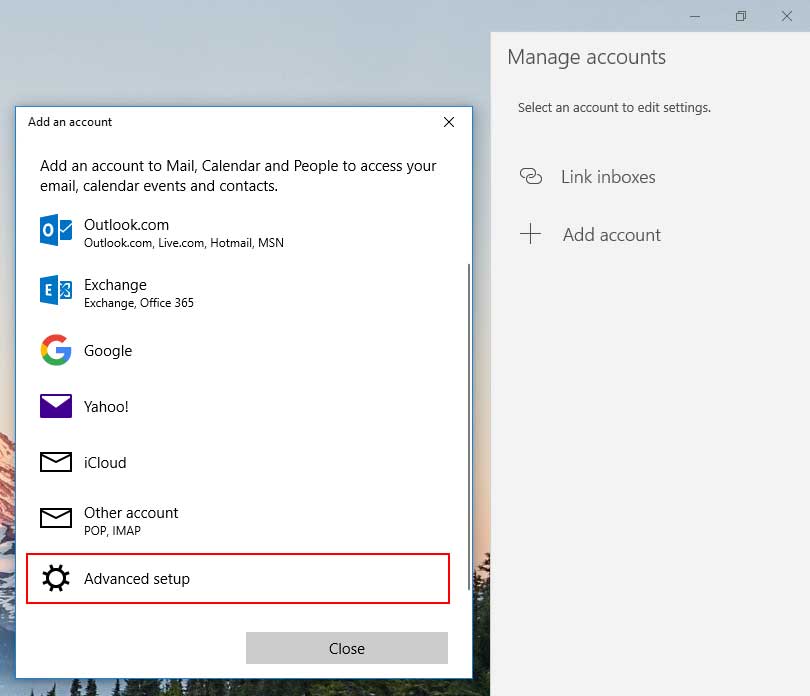
Step 2:
Select the type of account: POP3 or IMAP
Incoming Server – POP: pop.freecom.net
Incoming Server – IMAP: imap.freecom.net
The logon username will always be your email address
Apple Mail
Step 1:
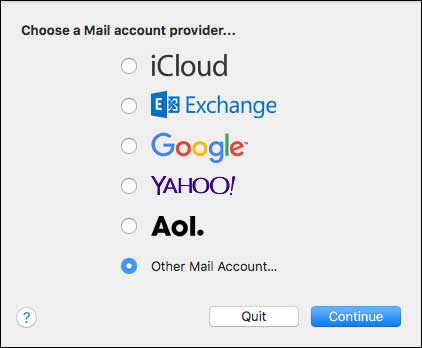
Open Mail select Accounts, and Select Other account type
Step 2:
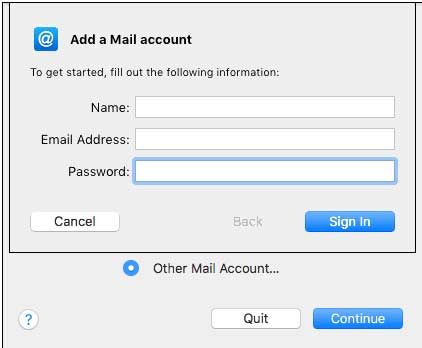
Enter the Display Name, Email and Password for the account
Step 3:
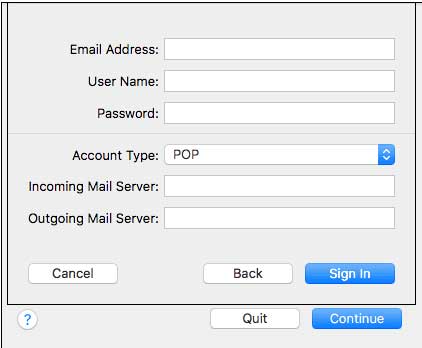
Enter your email address, password, and select either POP or IMAP account with the correct server along with your SMTP settings.
Incoming Server – POP: pop.freecom.net
Incoming Server – IMAP: imap.freecom.net
iOS Mail (iPhone/iPad)
Step 1:
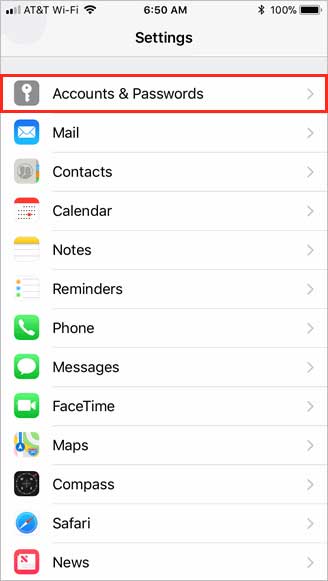
Select the Settings application then scroll until you see Accounts and Passwords
Step 2:
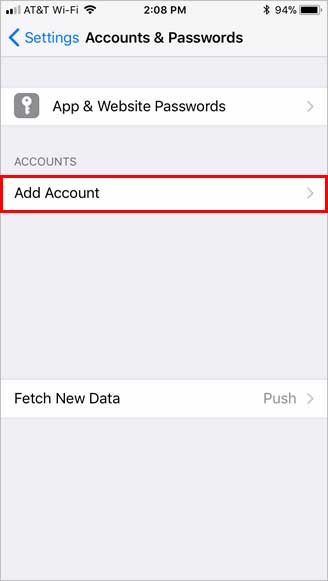
Select Add Account.
Step 3:
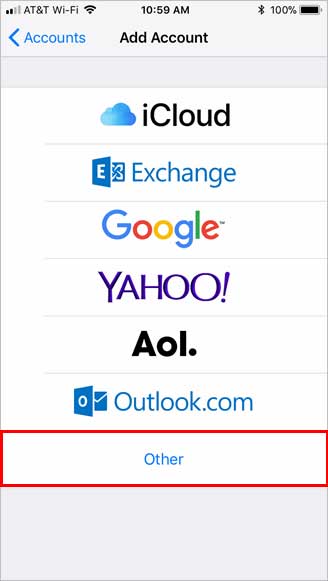
Select Other account.
Step 4:
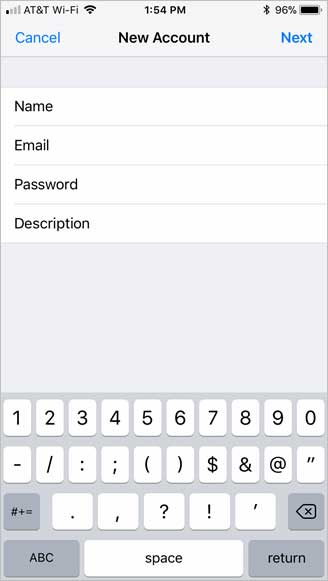
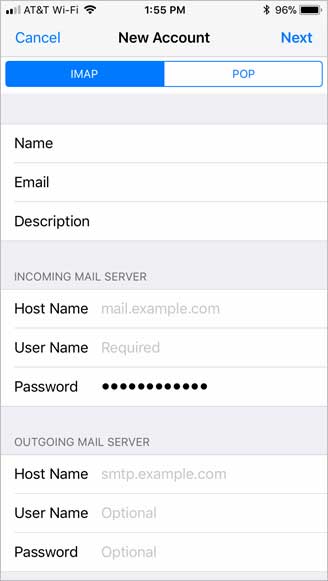
Enter your Name, Email and Password and press Next.
Step 5:
At the top of the screen, select either POP or IMAP account type.
Enter the Incoming server details.
Incoming Server – POP: pop.freecom.net
Incoming Server – IMAP: imap.freecom.net
The logon username will always be your email address
Enter the SMTP server that you are using along with the authentication Username and Password.
Freecom Mailbox Quota
Depending on the size of your inbox, you may receive an automated email informing you of current usage (when your over 90% full).
If you use a desktop program, such as Microsoft Outlook or Windows Live Mail, then it may be set to leave a copy of the these emails it downloads on our server.
There is an option you can enable to clear out the old emails off our server automatically which then stops you from getting this message.
WHAT YOU NEED TO DO
Please see the guides above for the email application you are using. The option in Outlook comes under More Settings Advanced Delivery.
Here you will see an option for leaving a copy of the message on the server, and a tick option to automatically remove the email after a certain period of days.
Please Note: This does not remove the emails from your local device, only emails left on the server once that have been downloaded by your POP account